Introduction
This crochet shell stitch baby blanket is a delightful project that you can create in the round, resembling a classic granny square. It’s a perfect item for baby showers, nursery decor, or for capturing those adorable newborn photos. Not only is it cute, but it’s also beginner-friendly, making it a fantastic choice for those just starting out in crochet or anyone looking to make a thoughtful gift.
Materials You’ll Need
- Yarn: Worsted weight (4) or DK (3) yarn — opt for soft acrylic, cotton, or baby yarn for comfort.
- Crochet Hook: 5.0 mm (H) or a size that suits your chosen yarn.
- Stitch Markers: Optional, useful for marking corners to keep your rounds organized.
- Tapestry Needle: For weaving in any loose ends.
- Scissors: To trim yarn as needed.
Finished Size
This blanket can be customized to various sizes:
– Lovey: 12″ x 12″ (30 x 30 cm)
– Stroller Blanket: 30″ x 30″ (76 x 76 cm)
– Crib Blanket: 36″ x 36″ (91 x 91 cm)
– Play Mat: 40″ x 40″ (102 x 102 cm)
Abbreviations
- ch: chain
- dc: double crochet
- sl st: slip stitch
- shell stitch: (5 dc in one stitch or space)
- corner shell: (3 dc, ch 2, 3 dc) in one space
Crochet Pattern / Step-by-Step Instructions
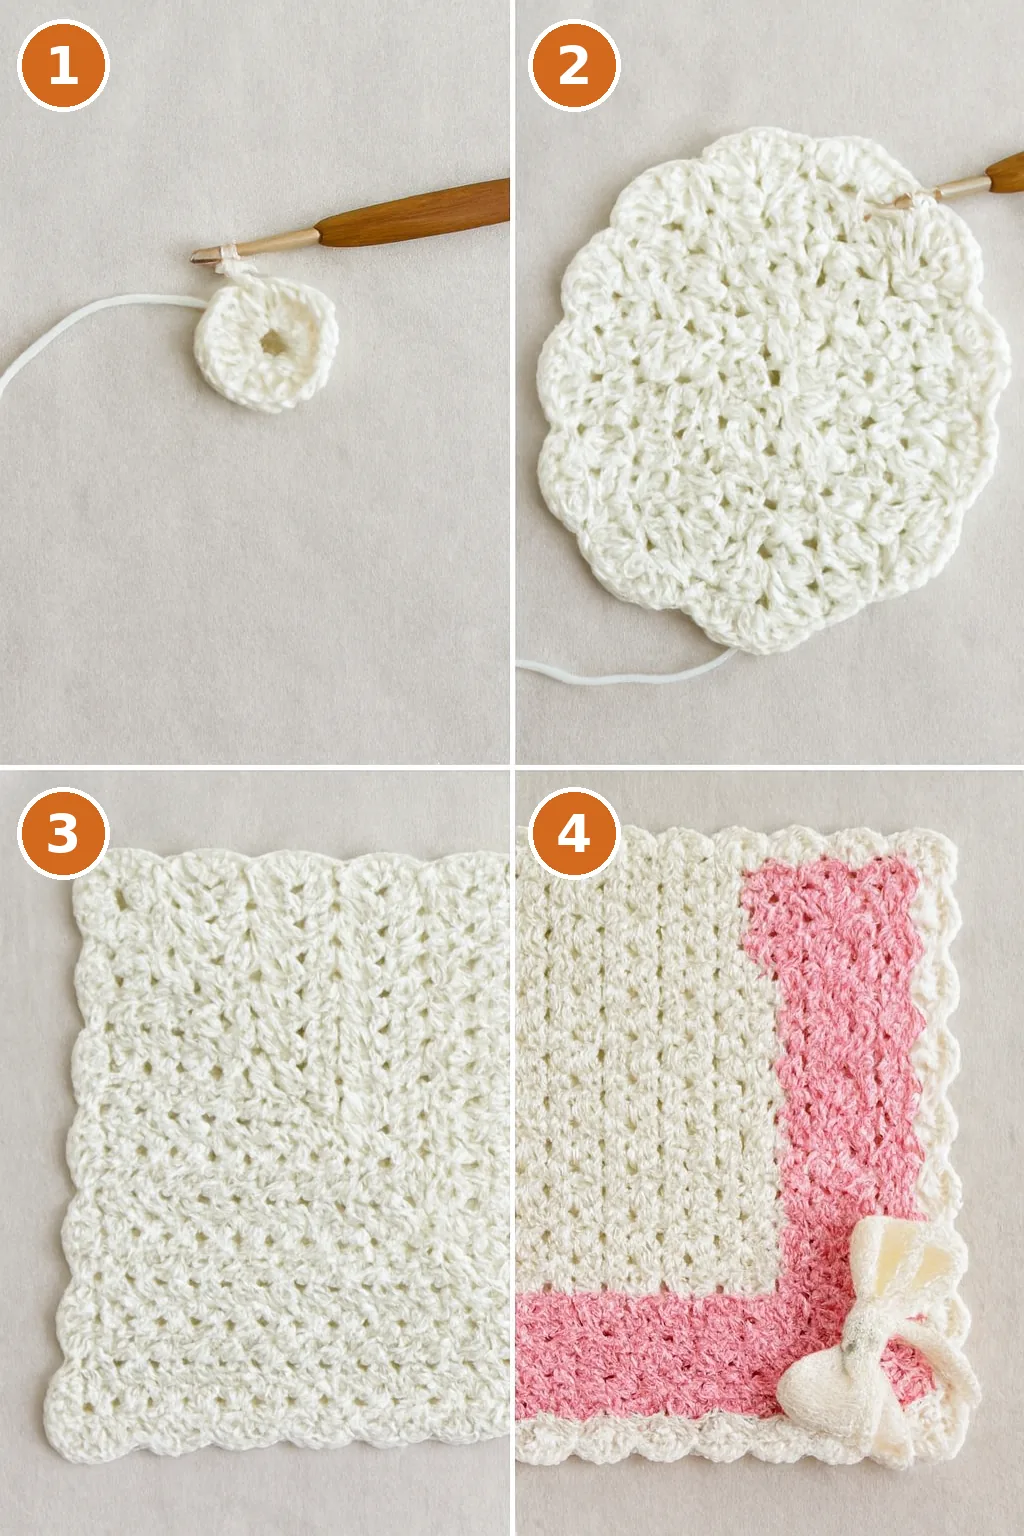
Step 1: Start with a Magic Ring
Rnd 1: Begin by making a magic ring. Chain 3 (this counts as your first double crochet), then work 2 double crochets into the ring. Follow this with a chain 2. Now, repeat the sequence of 3 double crochets followed by a chain 2 for a total of 4 times. Finally, join with a slip stitch to the top of your initial chain 3. At this point, you will have created 4 shell clusters and 4 chain-2 spaces.
Step 2: Create the Shell Stitch Square
Rnd 2: Slip stitch into the next chain-2 corner space. In this corner space, work (chain 3, 2 double crochets, chain 2, 3 double crochets) to form your first corner shell. Next, you will chain 1, work 3 double crochets in the space between the shells, chain 1 again, and then work (3 double crochets, chain 2, 3 double crochets) in the next corner space. Repeat this pattern around the round, and finish by joining with a slip stitch to the top of your starting chain 3.
Step 3: Continue Expanding Your Blanket
Rnd 3 and onward: Slip stitch into the chain-2 corner space. In each corner shell, work (chain 3, 2 double crochets, chain 2, 3 double crochets). Between each set of side shells, chain 1 and place 3 double crochets in the chain-1 space. As you progress, each round will add 4 corner shells and additional side shells between them. Continue this process until your blanket reaches your desired size.
Step 4: Finalize and Add Edging
Finish: Complete your final round and join with a slip stitch. At this point, you can either fasten off and weave in your ends or choose to add an edging for a polished look. Here are some ideas for optional edging:
– Picot edge: (single crochet in stitch, chain 3, slip stitch in the same stitch, skip 1) — repeat around.
– Shell edge: (5 double crochets in one stitch, skip 2, single crochet) — repeat around.
– Crab stitch: This is a reverse single crochet that gives a twisted cord appearance.
Helpful Tips
- Consider using stitch markers at the corners to help keep track of your stitches as you work.
- After finishing your blanket, block it to straighten the edges and enhance the stitch texture.
- Maintain an even tension throughout your work to prevent the granny square from twisting.
- Opt for a soft, washable yarn that will be practical and comfortable for the baby.
Conclusion
Creating this crochet shell stitch baby blanket in the round is not only a rewarding experience but also a lovely way to gift something special. With each round, you’ll see your work grow into a beautiful, cozy blanket that any baby would love. Enjoy your crocheting journey!