Introduction
This Beautiful Herringbone Crochet Crossbody Bag is a chic accessory that combines style with functionality. The unique herringbone pattern gives it a modern flair, while the option for a flap or zipper closure ensures versatility. Perfect for beginners, this project will enhance your crochet skills while producing a useful bag!
Materials You’ll Need
- Yarn: Worsted weight cotton or acrylic (smooth yarn works best)
- Hook: 4.5 mm or 5 mm, depending on your tension
- Lining (optional): Fabric and sewing needle for a structured interior
- Closure: 8” zipper or a magnetic snap
- Bag Strap: Leather/fabric strap or crochet your own
- Stitch Markers: Optional, for shaping and counting rows
- Scissors + Needle: For finishing and weaving ends
Yarn Information
For this project, choose a worsted weight yarn made of cotton or acrylic. A smooth yarn will give the best results, allowing the herringbone pattern to shine through beautifully.
Hook Size
Use a 4.5 mm or 5 mm crochet hook, depending on your personal tension.
Finished Size
The completed bag measures approximately 9 in wide by 6 in tall.
Difficulty Level
This project is categorized as Easy. You will learn the herringbone half double crochet (Hbhdc) stitch and some basic assembly techniques.
Abbreviations
- Hbhdc: Herringbone Half Double Crochet
- sc: Single Crochet
- sl st: Slip Stitch
Crochet Pattern / Step-by-Step Instructions
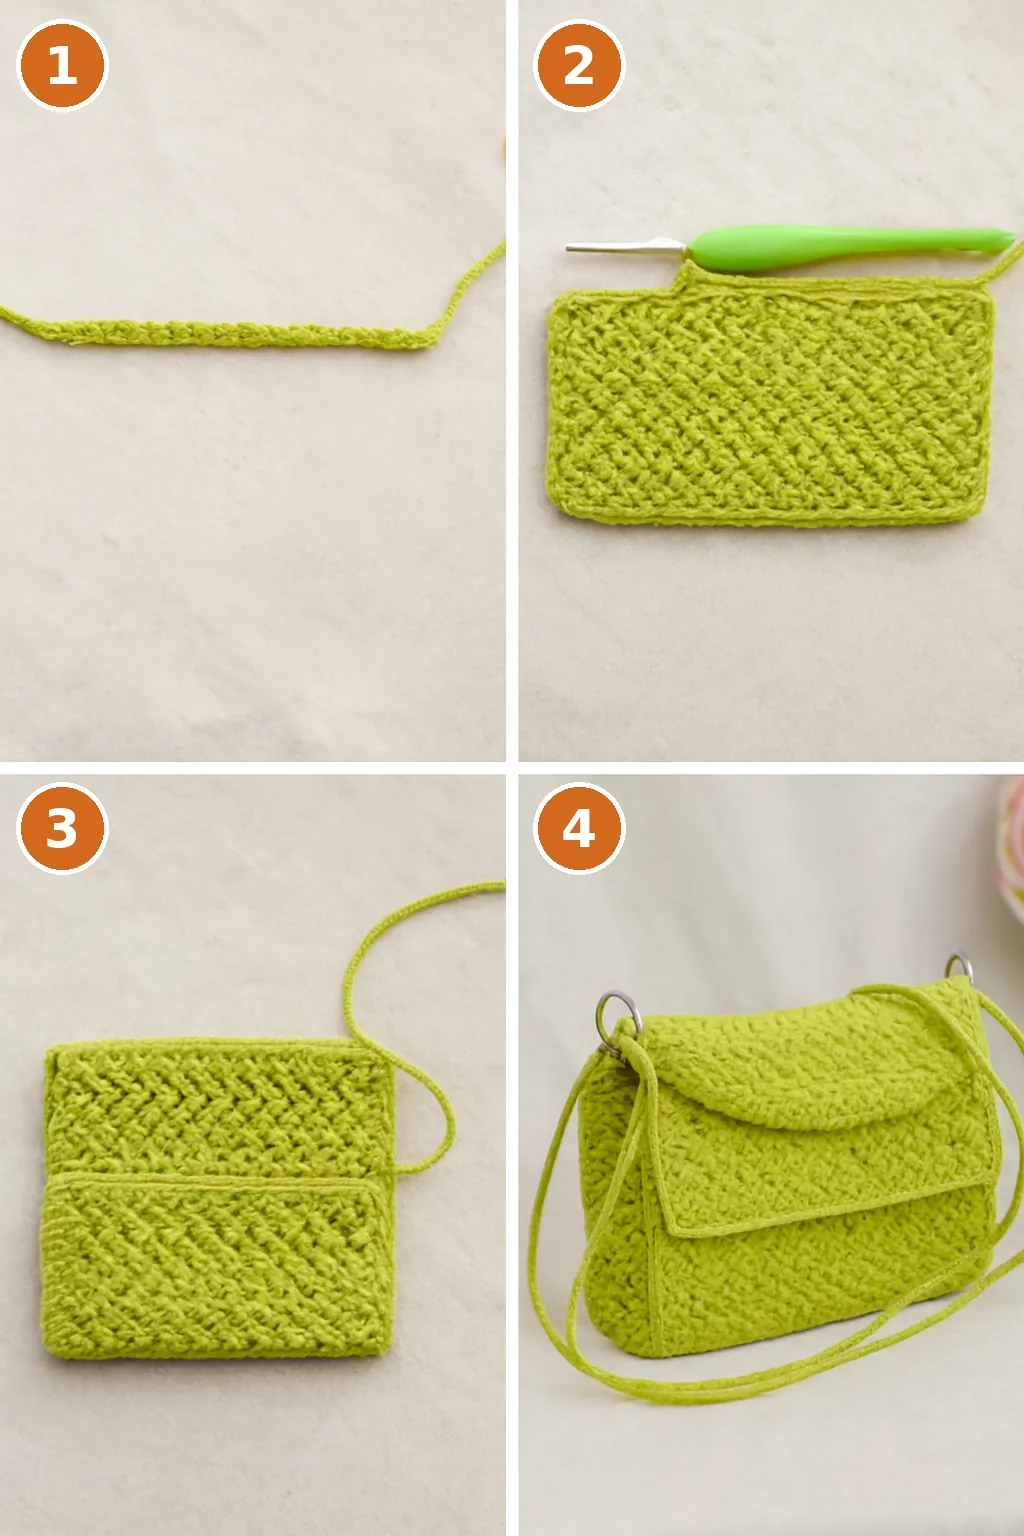
MAIN BAG BODY (Worked in a flat rectangle)
- Foundation Chain: Ch 35 (or desired width).
- Row 1: Hbhdc in 2nd ch from hook and across. (34 sts)
- Rows 2–40: Ch 1, turn. Hbhdc in each st across.
Assembly
- Fold the rectangle so the short sides meet, resembling a clutch.
- Leave ⅓ of the height for the flap if you wish to include one.
- Seam the sides using slip stitch or whip stitch for a secure finish.
Finishing
To give the bag a polished look, work a round of single crochet around the bag’s edge, including the flap if applicable.
Customization Ideas
- Add fun tassels, leather tags, or a small pocket inside for personal flair.
- Experiment with color blocks or stripes within the herringbone rows for a unique design.
Helpful Tips
- Before starting, practice the Hbhdc stitch with a small swatch to gain confidence.
- Use stitch markers to keep your rows even and organized throughout the project.
- Check your gauge to ensure your bag turns out the correct size.
Care Instructions
- Spot clean your bag with a damp cloth.
- If using cotton yarn, air dry the bag flat to maintain its shape.
Frequently Asked Questions
Q: What is the best yarn to use for this project?
A: A smooth worsted weight cotton or acrylic yarn is ideal for showcasing the herringbone pattern.
Q: Can I customize the size of the bag?
A: Yes, you can adjust the foundation chain to modify the width, and the number of rows to change the height.
Q: Is it necessary to add a lining?
A: Adding a lining is optional. It can enhance the structure and durability of your bag.
Q: How can I ensure the stitches are even?
A: Using stitch markers will help you keep track of your rows and ensure even stitches.
Q: What type of closure works best?
A: Both a zipper and a magnetic snap closure offer secure options; choose based on your preference.
Q: Can I wash the bag?
A: It is best to spot clean your bag. If it’s made from cotton yarn, air drying is recommended to prevent shrinkage.
Conclusion
With this crochet herringbone crossbody bag pattern, you’ll create a stylish accessory that you can use every day. Happy crocheting! Remember to enjoy the process and let your creativity shine through as you make this beautiful bag.