Introduction
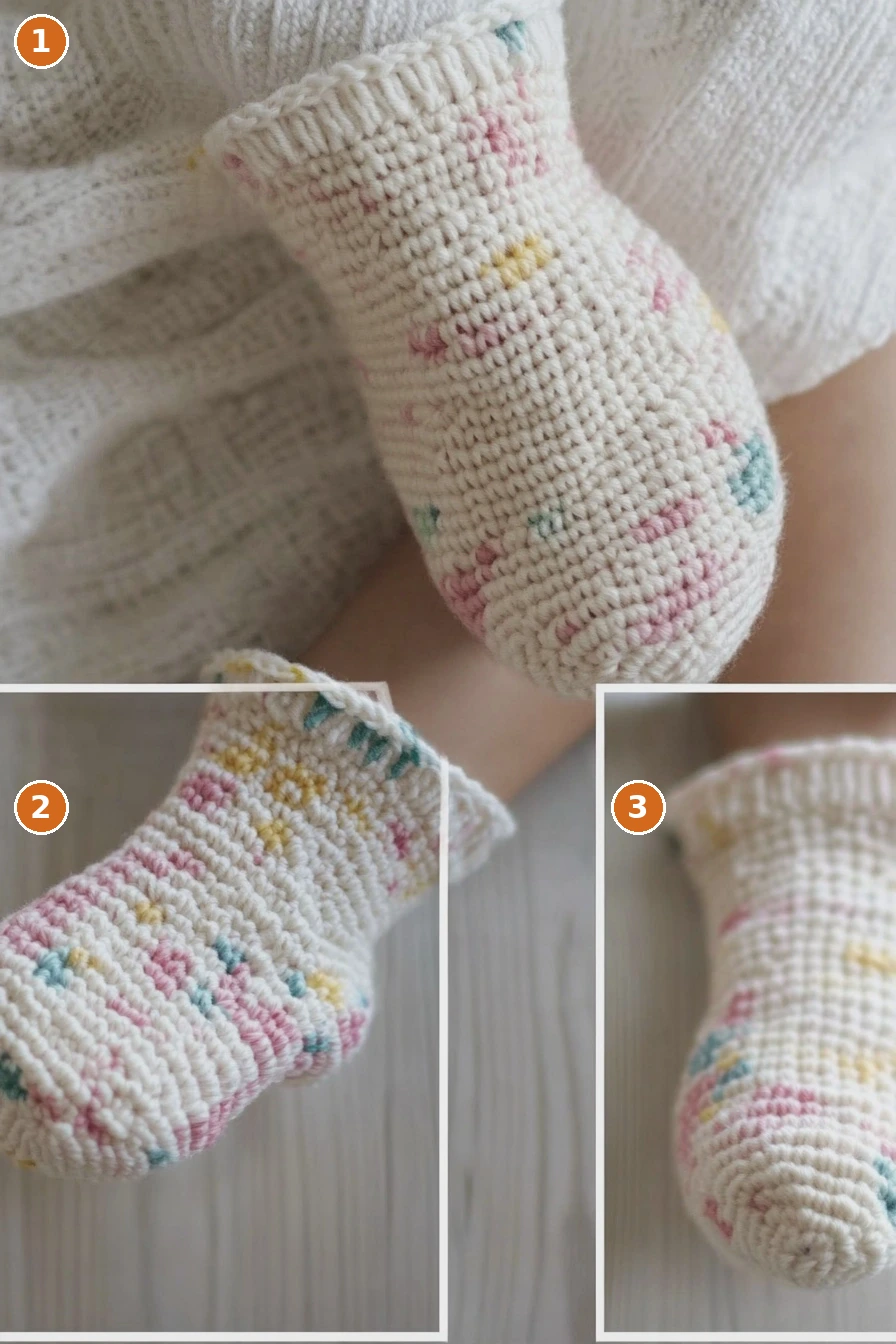
Crochet socks are a delightful way to keep your feet warm and cozy. This pattern is designed with comfort and flexibility in mind, making them perfect for everyday wear inside your favorite shoes. With a toe-up construction and an afterthought heel, these socks will be a rewarding challenge for those ready to take their crochet skills to the next level.
Materials You’ll Need
- Yarn: Approx 280-300 yds of Knit Picks Hawthorne Speckle Hand Painted Yarn (Colorway: Surprise Speckle)
- Crochet Hook: 4 mm crochet hook
- Crochet Hook: 3.5 mm crochet hook (for cuff)
- Yarn Needle
- Scissors
Yarn Information
Use Knit Picks Hawthorne Speckle Hand Painted Yarn, which is a super fine (#1) blend of wool and nylon. This yarn offers both warmth and stretch, making it ideal for socks.
Hook Size
You will need a 4 mm crochet hook for the main body of the sock and a 3.5 mm crochet hook for the cuff.
Finished Size
This pattern includes instructions for Women’s Small, Medium, and Large sizes.
Difficulty Level
This project is classified as Advanced due to the use of advanced techniques such as toe-up construction and afterthought heel.
Abbreviations
- BLO: Back Loop Only
- Ch(s): Chain(s)
- Cont: Continue
- Hk: Hook
- Prev: Previous
- PM: Place Marker
- Rem: Remaining
- Rep: Repeat
- Sc: Single Crochet
- Sc2tog: Single Crochet Two Together
- Sc3tog: Single Crochet Three Together
- Sk: Skip
- Slst: Slip Stitch
- St(s): Stitch(es)
Gauge
To achieve the correct fit, make sure to check your gauge: 6 sts = 1″ worked in single crochet in the round.
Pattern Notes
- These crochet socks are worked from the toe up with an afterthought heel.
- Single crochet stitches are worked through the front of the single crochet from the previous round, similar to the waistcoat stitch.
Crochet Pattern / Step-by-Step Instructions
Toe
- Rnd 1 (All sizes): Ch 7. Sc in 2nd ch from hk and next 4 ch. 3 sc in last ch. Working on the opposite side of ch, 1 sc in each ch to last. 2 sc in last ch. PM in 1st, 6th, 8th, and 13th sts. (14 sts)
- Rnd 2: 2 sc in 1st marked st. Replace marker in 1st sc. 1 sc in each st to next marker. 2 sc in marked st. Replace marker in 2nd sc. Sc in next st. 2 sc in marked st. Replace marker in 1st sc. Sc in each st to next marker. 2 sc in marked st. Replace marker in 2nd st. Sc in last st. (18 sts)
- Repeat: Continue repeating this round until you have 38 (46, 54) sts.
- Keep the beginning of the round marker, and remove the rest.
Foot
- Rnd 1: 1 sc in each st.
- Repeat: Continue this round until the length measures 4.5 (5, 5.5) inches.
- PM: PM in 10th (14th, 18th), 12th (16th, 20th), 28th (36th, 40th), and 30th (38th, 42nd) sts.
Heel Gusset
- Rnd 1: Sc in each st to the first marker. 2 sc in marked st. Replace marker in 1st sc. 1 sc in each st to next marker. 2 sc in next marked st. Replace marker in 2nd sc. Sc in each st to next marker. 2 sc in marked st. Replace marker in 1st sc. Sc in each st to next marker. 2 sc in marked st. Replace marker in 2nd st. Sc in last st. (42 (50, 58) sts)
- Rounds 2-3: 1 sc in each st.
- Repeat: Repeat the previous three rounds a total of 6 times.
- Place a new marker: Insert a new marker in the 7th stitch between the heel gusset markers. Retain the beginning of the round marker and take out the other gusset markers.
Crochet Socks Upper
- Rnd 1: Sc in each st to the first marker and sc in marked st. Ch 17 (21, 25). Sc in next marked st. Sc in each st to end of round. (50 (58, 66) sts)
- Rnd 2: Sc in each st to ch. 1 sc in each ch. 1 sc in each st to end of round.
- Rnd 3: 1 sc in each st.
- Repeat: Continue repeating the last round 2 (4, 6) more times. Remove all markers. Slst in next st, and fasten off.
Cuff
- Row 1: With the smaller hk, fasten on in any st at the back of the sock. Ch 5 (6, 7). Slst in 2nd ch from hk and in each rem ch. Slst in next sc. Turn.
- Row 2: Slst in BLO in each st. Ch 1 and turn.
- Row 3: Slst in BLO in each st. Slst in next sc. Turn.
- Repeat: Continue repeating the last two rows until you can no longer slip stitch to any single crochet.
- Fasten off: Fasten off and seam ends. (46 (54, 62) sts)
Heel
- Rnd 1: With larger hk, fasten on in the first st of the bottom of the open heel. Sc in same st (ch 1 doesn’t count as st). Sc in each st to st before next corner. Sc3tog st before the corner, corner st, and first ch of the top opening of the heel. PM in sc3tog. Working in the underside of ch, sc in each ch to last 15 (19, 23) sc. Sc3tog last ch, corner st, and next st. PM in sc3tog. (44 (52, 60) sts)
- Rnd 2: Sc in each st to st before marker. Sc2tog st before the marker and marked st. Replace marker in sc2tog. Sc in each st to next marker. Sc2tog marked st and st after. Replace marker in sc2tog. (42 (50, 58) sts)
- Repeat: Repeat the last round 8 (10, 12) more times.
- Finishing: Remove all markers and slst in next st. Fasten off leaving about a 12 inch tail. Turn the heel inside out and seam opening. Weave in any rem ends.
Care Instructions
Care for your crochet socks is influenced by the type of yarn used. While many sock-weight acrylics or superwash wools can be cleaned in a machine, hand-dyed or non-superwash wools require hand washing to preserve their shape and color. Always refer to the yarn label for washing instructions.
Frequently Asked Questions
Q: Can I use a different yarn for this project?
A: Yes, but ensure it is of similar weight and fiber content to maintain the shape and comfort of the socks.
Q: How do I know if my socks fit?
A: Measure your foot size and compare it with the finished dimensions listed in the pattern.
Q: Can I customize the length of the socks?
A: Absolutely! Simply adjust the number of rounds worked in the foot section before starting the heel gusset.
Q: What if I lose my place in the pattern?
A: Use stitch markers generously throughout the rounds to help maintain your place and ensure accuracy.
Q: How can I make these socks more decorative?
A: Consider adding stripes or patterns using different colors to enhance the visual appeal of your socks.
Conclusion
Crocheting your own socks is a rewarding experience that results in a cozy pair of footwear perfect for any occasion. Follow this detailed guide, and soon you’ll be enjoying your handmade socks!