Introduction
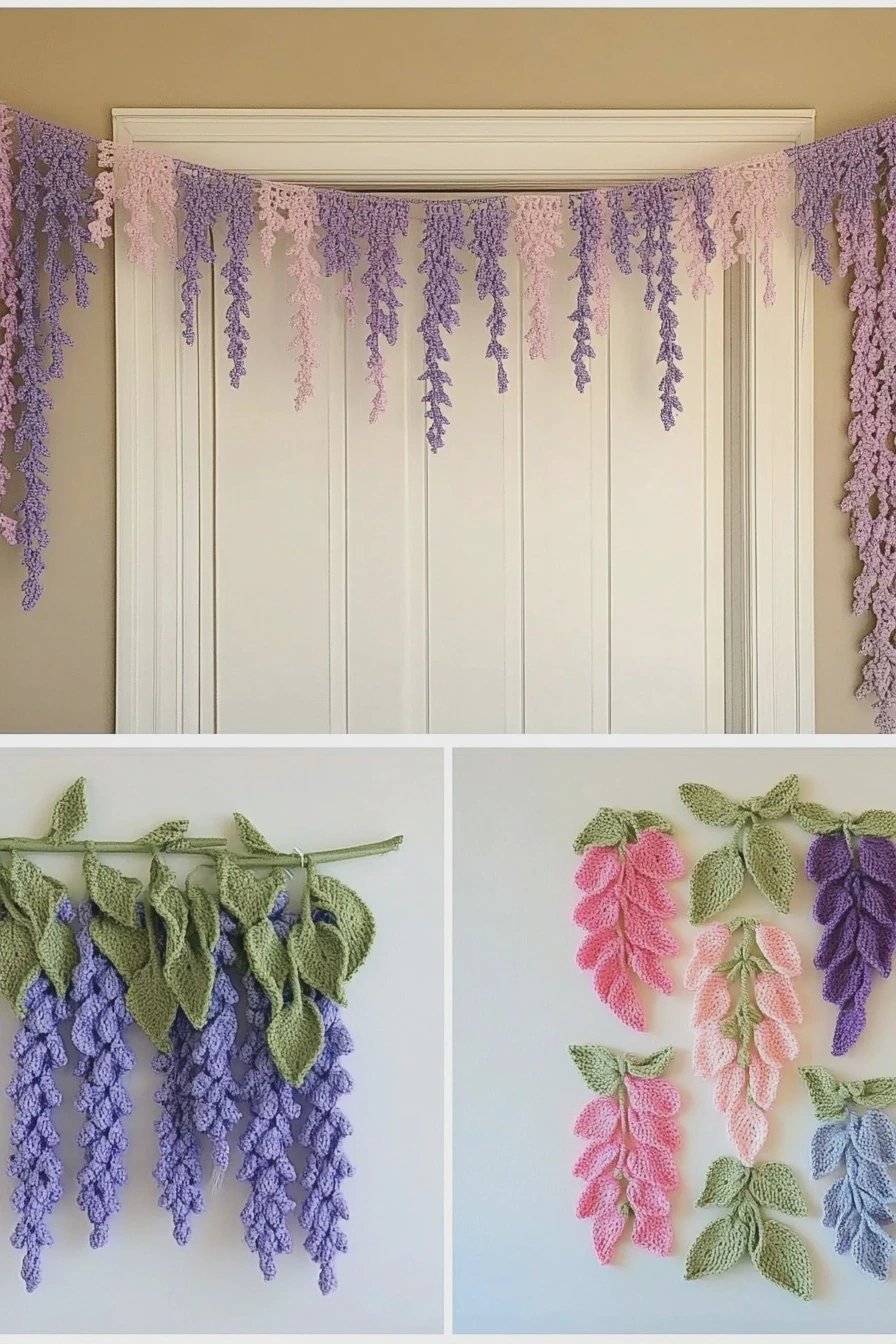
Are you looking to add a charming touch to your home decor? These 5 crochet wisteria door garland free patterns are perfect for beginners and will enhance any entryway. Wisteria flowers are known for their delicate beauty, making them an ideal choice for a decorative garland. This guide will not only share these lovely patterns but also provide essential tips and techniques to help you create your own stunning garland.
What You Need to Start
Before diving into the crochet patterns, gather the following supplies:
– Yarn: Choose a lightweight yarn in lavender, green, and white.
– Crochet Hook: A size G (4.0 mm) hook is perfect for beginners.
– Scissors: For cutting yarn.
– Tapestry Needle: For weaving in ends.
– Measuring Tape: To measure your garland length.
Basic Crochet Techniques for Wisteria Garland
Here are five essential crochet techniques that will help you create your wisteria door garland. Mastering these stitches will give you the foundation needed to craft your beautiful project.
1. Chain Stitch (ch)
What It Is: The foundation of most crochet projects, it creates the initial row.
How to Work It:
1. Make a slip knot on your hook.
2. Yarn over and pull through the loop on your hook.
3. Repeat until you reach the desired length.
Uses: Used as a base for many patterns, including garlands.
Common Mistake: Forgetting to keep your tension even can lead to uneven stitches.
2. Single Crochet (sc)
What It Is: A basic stitch that creates a tight, sturdy fabric.
How to Work It:
1. Insert your hook into the stitch.
2. Yarn over and pull up a loop.
3. Yarn over again and pull through both loops on your hook.
Uses: Great for creating the leaves and stems in your garland.
Common Mistake: Not inserting the hook into the correct stitch can create holes.
3. Double Crochet (dc)
What It Is: A taller stitch that adds height and texture.
How to Work It:
1. Yarn over and insert your hook into the stitch.
2. Yarn over and pull up a loop (3 loops on hook).
3. Yarn over and pull through the first two loops.
4. Yarn over and pull through the remaining two loops.
Uses: Perfect for making the wisteria flowers pop!
Common Mistake: Skipping yarn overs can lead to missing stitches.
4. Slip Stitch (sl st)
What It Is: A simple stitch used to join pieces or create a seamless finish.
How to Work It:
1. Insert your hook into the stitch.
2. Yarn over and pull through both loops immediately.
Uses: Ideal for joining flowers to the garland.
Common Mistake: Tension can affect how tightly the pieces join together.
5. Magic Ring (MR)
What It Is: A technique to start rounds without leaving a hole.
How to Work It:
1. Wrap the yarn around your fingers to form a loop.
2. Insert your hook into the loop and pull up a loop.
3. Chain 1 to secure the ring.
Uses: Useful for starting flower motifs.
Common Mistake: Not pulling the magic ring tight enough can leave a gap.
Practice Swatch
Before you start working on your garland, it’s a good idea to practice these stitches with a small swatch. Create a little piece using chain stitches, single crochet, and double crochet to get comfortable with the techniques. This practice will build your confidence and ensure you are ready to tackle the wisteria patterns!
Step-by-Step Guide to Creating Your Wisteria Garland
Step 1: Create the Base Chain
Begin by making a foundation chain that is the desired length of your garland. For example, if you want a 5-foot garland, chain enough stitches to reach that length. Make sure it is not too tight, as this will affect the overall drape of your garland.
Step 2: Work the First Row
Once you have your chain, turn your work and start with a row of single crochet. This will provide a sturdy base for your flowers and leaves. Remember to count your stitches to maintain an even row.
Step 3: Craft the Wisteria Flowers
Using the double crochet stitch, create clusters of flowers along the garland. You can use the magic ring technique to start each flower, which will help avoid gaps in the center. Make several flowers to ensure your garland looks full and vibrant.
Step 4: Add Leaves and Stems
Using the single crochet stitch, create leaves to accompany your flowers. Attach these leaves between flower clusters to create a natural look. You can vary the size of the leaves for added interest.
Step 5: Assemble the Garland
Once all your flowers and leaves are made, it’s time to assemble them onto your base chain. Use slip stitches to securely attach each flower and leaf to the garland. Ensure they are spaced evenly for a balanced appearance.
Frequently Asked Questions (FAQ)
Q: What yarn is best for crochet garlands?
A: Lightweight cotton yarn works best for durability and ease of handling.
Q: How long should my garland be?
A: Aim for a length of about 4-6 feet, depending on your door size.
Q: Can I customize the colors?
A: Absolutely! Feel free to choose colors that match your decor.
Q: How do I secure the flowers to the garland?
A: Use slip stitches or whip stitches to attach each flower securely.
Q: How do I care for my crochet garland?
A: Hand wash gently and lay flat to dry to avoid stretching.
Conclusion
Creating a beautiful crochet wisteria door garland is a rewarding project that adds a personal touch to your home. By mastering these five crochet techniques, you’ll be well on your way to crafting a stunning garland that showcases your creativity. Dive into the patterns, enjoy the process, and let your crochet skills blossom! As you work through these patterns, remember to take your time and have fun with your creations. Each flower you make can be a unique expression of your style, and the process of putting it all together will surely be a delightful experience. Happy crocheting!